Showing posts with label DIY. Show all posts

Sunday, May 8, 2011

Best Mom Contest!

For the past week cyberspace has been flooded with love-letter-status-updates for “The Best Mom in the World!” Profile pictures on Facebook have been changed to show photographs of millions of lovely mothers, and I have to say it truly is heartwarming.

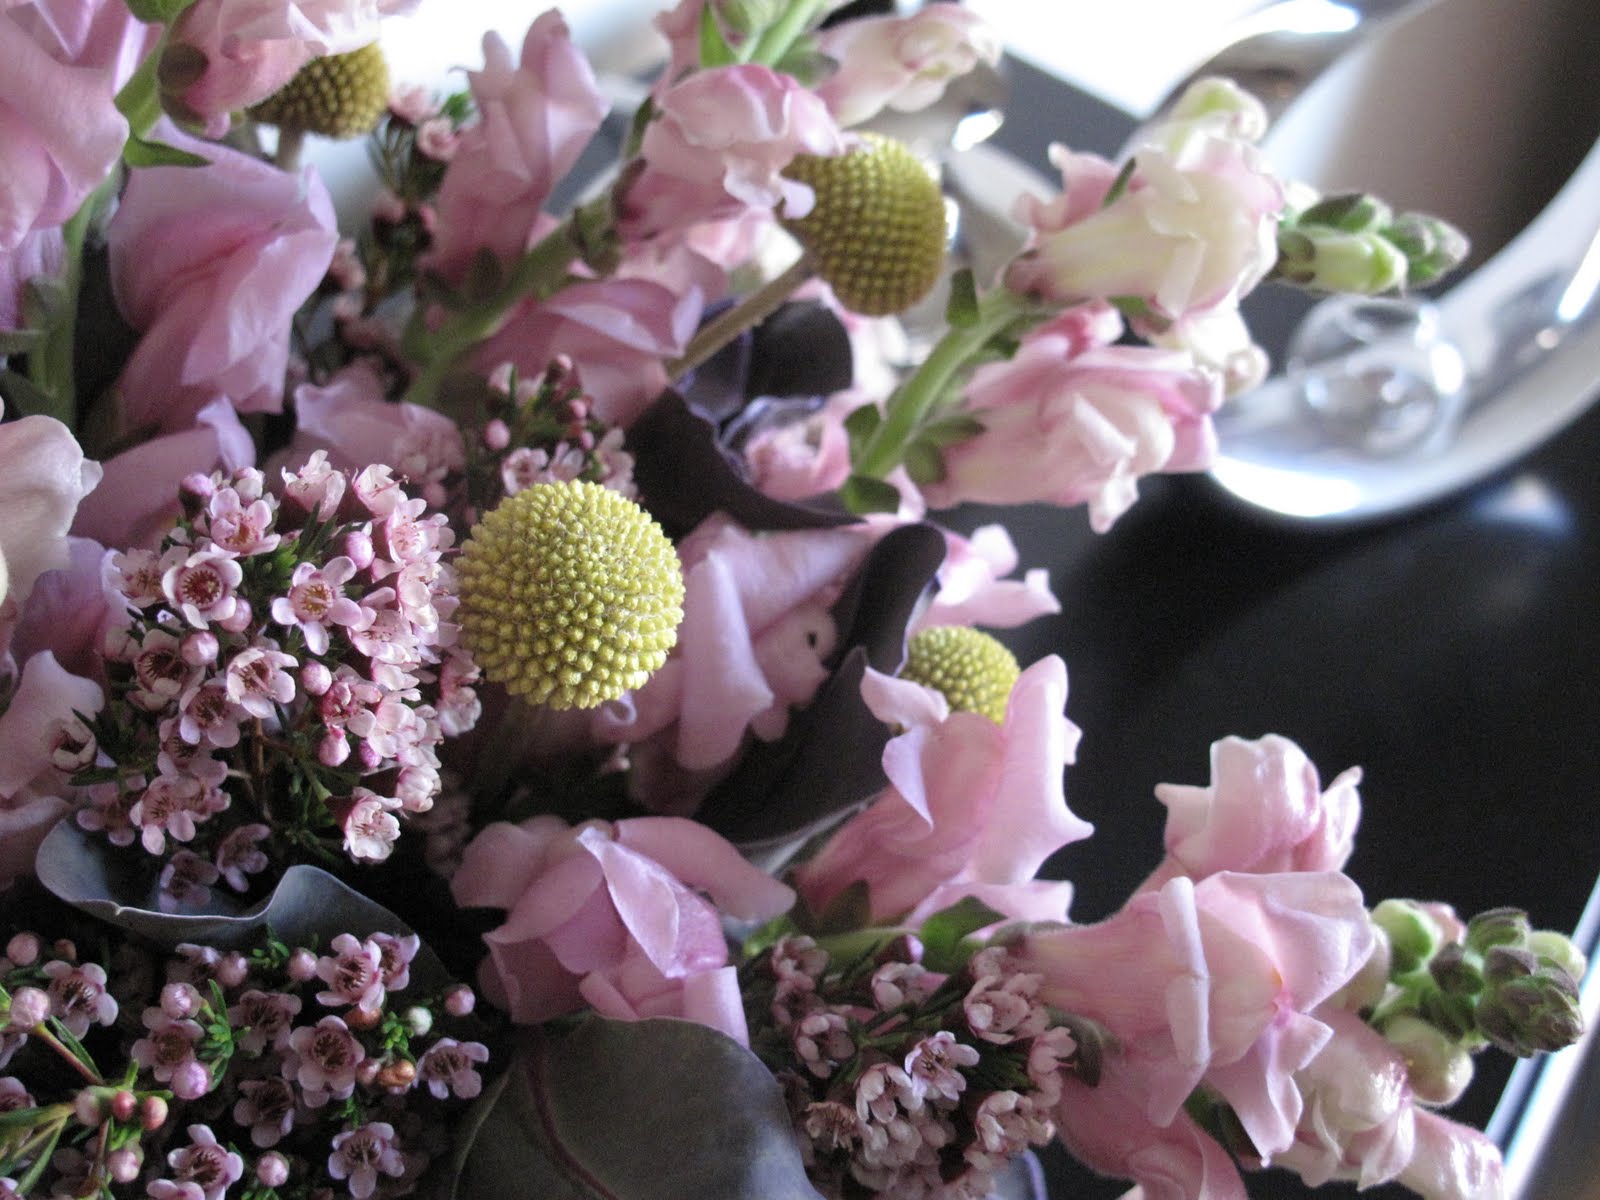
This year, I was commissioned by a soon-to-be dad and very good friend to create two mother’s day floral arrangements; one for his lovely lady, and one for his lovely mother.  So, off to the flowermart I went where I picked up a two bunches of pink Snap Dragons, one bunch of pink Wax Flower, one bunch of Snow Flower that had been enhanced in the color department to give it a very light purple hue,two bunches of Crespedia (Billy Balls),  and two black bowl vases.
 These arrangements were begging to look whimsical yet to have an organic look and feel to them.
Since these arrangements were going to be picked up, I needed to create a safe way for them to travel in the car without the vases breaking. So I decided the best thing to do would be to dress up the boxes that the vases came in.

Tools: Boxes, Wax Paper, Scissors, Tape, and Ribbon

I cut the flaps off of the boxes, wrapped them in wax paper, secured the wax paper with scotch tape, and tied ribbon around them… Voila!  The prettiest carrying case you’ve ever seen!
Happy Mother’s day to all the “Best Moms in the World”!  

Sunday, April 3, 2011

"Can" Do!

I enjoy collecting cans and tins. They have a multitude of functions, and are really fun and easy to dress up in different skins.
 I sauntered over to the San Francisco Farmer’s market this weekend, and paid $22 dollars for 3 bunches of Rununculus, and 2 bunches of Tulips. These flowers bring complete spring joy with all their color and texture.
 
Once I got home, I gathered my tins, cans, left over ribbon, and wrapping paper, and started to play dress up. This is the part that I love getting creative with. Mixing and matching papers and ribbons to my heart’s desire to come up with some fun designs.
 A word of caution; some tin cans are not sealed, so make sure you test them before you dress them up to avoid any leakage or spillage. If the tin cans are not sealed, you can create a simple lining with a  ziplock bag and a rubber band:
 Once the cans were dressed to my satisfaction, I started to play with the floral array that lay ahead of me.
 
The moral of the story is, with a little bit of mix and match, you too “can” create great arrangements for any occasion!

Sunday, June 6, 2010

'Friendliest Flower'

Trivia: What movie is the following Quote from? (The winner gets a free floral arrangement…granted that you live within driving distance. Sorry to my overseas fans ;))

-“I love daisies.”
-“You told me.”
-“They're so friendly. Don't you think daisies are the friendliest flower?”

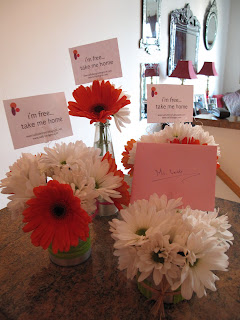
This week’s shopping venture was the infamous Costco, where you can sample processed foods galore, buy a couch, and also do weekly grocery shopping to feed a whole nation! I had always noticed that they sell flowers at Costco but had never actually bought any there and really wanted to see what my $20.00 budget could buy me, and what variety I had to pick from. The variety was pretty generic and consisted of Roses, Sunflowers, Iris, and Daisies. Since it was a gorgeous summer day outside, I decided to go with the “friendliest flowers”; Bright orange Gerber Daisies, and white Marguerite Daisies.

Price: $18.67 (Score! Under budget by $1.33)

For the past couple of weeks I’ve been saving tomato sauce cans. They’re the perfect size for flowers, and have a lot of potential on how to “dress” them up. I had some left over silver wrapping paper from last year’s Christmas festivities, and a piece of left over Green natural fiber wrapping paper from another craft project that I had worked on. A pair of scissors, and a couple of pieces of tape later, I had my nifty little vases ready for their flowers:


As I was rummaging through my craft box, I found some silver wire that would be perfect as an accent to piece for the arrangements. I grabbed the closest pen in sight, and started to wrap the wire around it to create a coil:

Once the coils were ready, it was time to play with the flowers, and bring the arrangements to life:


Phantom delivery time!

Tip: Gerber Daisies tend to have softer stems and a heavy flower head that tend to droop after a couple of days. A way to reinforce them is to wrap the stems with silver wire to prevent them from drooping.

Saturday, May 8, 2010

For Mom


“Roses, 5 Dollars” “Tulips, SPECIAL 6 Dollars”, “Hydrangeas for Mom”….These were just some of the signs that were lining the entries to the wholesaler stalls this morning at the SF Flower Market. Vendors were helping customers decide if they should get roses or tulips, while children were picking up what they could from the floor and arranging mini bouquets as they were waiting for their parents to pay. The vibe at the market reminded me of the scene out of “My Fair Lady”. I felt breaking out in song and belting out “Now woooooooooooouldn’t it be loverrrly?” (Audrey Hepburn would NOT be pleased with my singing!)

As I walked among all the gorgeous flowers, I thought that roses and tulips have been done 1,000,000 times over, and that I would work with Kale for Mother’s day. Yes, that’s right, KALE!

So here we go…

Shopping list: Flowering Kale (and you thought I was kidding), Bells of Ireland, Tritoma

Cost: $19.50

Tools: Flowers, Scissors, Recycled Containers, All Natural Wax Paper, Rubber Bands, Raffia:

Step 1: I grabbed a Trader Joe’s Hummus container, a Pavel’s Yogurt container (Low Fat of course), and a couple of Folger’s Coffee/Del Monte Peach Mason Jars and wrapped them in all natural wax paper. To make sure the paper held, I secured them with a rubber band around the top:

Step 2: Since Kale was at the top of my shopping list this week, I decided that the it would be the focal point of my arrangements and made sure that the Tritoma and Bells of Ireland accented it in all the right places:

Step 3: This is the first week that my alter ego “Phantom Floranista” and sidekick sister “Fish” dropped off the flowers at people’s doorsteps with a sign reading:

As I finish up this entry, I’m wishing that my mom was here in the US so I could gift one of the arrangements to her. Seeing as she’s thousands of miles away, I dedicate this week’s blog to her. I LOVE YOU MOM! (P.S. Thanks for all the Kale soup when we were kids…)


Saturday, May 1, 2010

Phantom Floranista


The Mission: To create inexpensive arrangements using recycled materials from around the house that will fill your home with beauty, your heart with joy, and leave a smile on your face.

Every Saturday at 8:00 am (PST) I will be venturing to the San Francisco Flower Market where I will be purchasing between $10 -$20 worth of flowers. I will then arrange these flowers in recyclable/reused containers that accumulate from a weeks worth of grocery shopping, and will design arrangements that can be used as centerpieces for dinner parties, accent pieces for the house, or just a little gift for a friend. I'll be photographing, documenting, and blogging about every step to prove that floral arrangements don't have to be expensive to be beautiful.

Phantom Floranista Project: Once I've shared my ideas with the cyber world, i'll be dropping off the arrangements at random doorsteps in my neighborhood with the hope that the people who receive them will smile. It's kind of like the "Free Hugs" project, except with, well, flowers!

Who knows, maybe I can even inspire you to do the same in your neighborhood....

So, here we go.... Today's inspiration was France. I just got back from a killer trip in Paris, so naturally when I saw the gorgeous French Tulips at the SF Flower Mart, I just HAD to buy them!

Shopping List: French Tulips, Snowball Tree Flower, Water Lily Seed Pod

Cost: $20.00


Tools: Flowers, Scissors, Recycled Containers, Recycled Gift Wrap Paper, Recycled Ribbon:

Step 1: I used a Philadelphia Cream Cheese container, and a Trader Joe's Hummus container wrapped in some saved gift wrap paper, a few jars, and a wine bottle I had kept to create the "vases" that will hold the flowers:

Step 2: I arranged my containers to get an idea of what the centerpiece heights will be:

Step 3: Placement of the flowers is my favorite part. Let your creative juices flow freely, and place your flowers as your heart desires, and VOILA!


Tips:
1) Working in odd numbers is always best. It adds a level of interest to an arrangement that even numbers wont. for example, try to place 3 blossoms of a flower in the same vase instead of 2 or 4.
2)Remember that when you're placing flowers in containers for a centerpiece, you want to keep in mind that the centerpiece will be viewed from all angles, so keep it interesting all the way around.