Showing posts with label centerpiece. Show all posts

Sunday, August 7, 2011

Polish it up

There is something oddly satisfying about polishing silver… Maybe it’s the instant gratification of taking something from oxidized to shiny in less than two minutes. Or maybe it’s just seeing a bunch of bling bling in your house after you’re done. In any case, it’s an obsession of mine, so today I busted out the silver polish, and went to work on a tea set I had purchased at a consignment shop 4 years ago. After self-indulging in my OCD silver polishing habits, I decided to use the silver tea pot, coffee pot, and dish as containers for this week’s floral arrangement.  
A little spit and polish goes a long way! ;) 
The SF Flower Mart was bursting with all different types of Dahlias.  Since I have a weakness for Dahlias (especially in crimson) I grabbed a bunch, along with a couple stems of blooming Artichoke, some Queen Annes’ Lace, and Sedum.  The floral palette I chose had a very English-summer-in-the-country feel to it, and fit perfectly in the containers I had just polished up.
Varying heights in centerpieces help add to the visual interest
The moral of the story is, get creative with your containers, and NEVER say “no” to your Nana’s silver tea set, because no matter how modern our lives have become, you can always reuse vintage items in a modern way! 

Monday, April 11, 2011

Cook Off!

We had a one of a kind cook-off at Phantom Floranista headquarters this weekend! Spanish cuisine vs. Persian Cuisine. Everything was absolutely delectable! Gazpacho, Paella, and Persian Sour Cherry Rice were just a few of the dishes that we devoured during the course of an 8 hour ordeal!

As you all know, every time we have an event at HQ, I go all nuts with the flowers, and this event didn’t prove to be any different. I allowed myself to go a bit crazy with the floral budget and ended up spending $44.00 dollars on flowers at the SF Flower Mart. Purple Pride of Madeira, purple Anemones, Waterlily seed pods, some green filler, and finally a couple of bright yellow bunches of Crespedia completed my shopping list.  

 I pulled out a couple of vases I had used for past events, and decided that I would create a tiered look by using one 12” tall vase, and one 5” tall vase for the center of the dining table that all the food would be served.
 When putting together an arrangement that is in multiple vases, be sure to think of the design as something that could work separately in two different rooms, but also something that will look good together on one table as a center piece. Juxtapose placement of focal and accent flowers to create interest, and finally don’t be afraid to be bold! 

Tuesday, November 23, 2010

Thankful

Thanksgiving is a holiday that revolves around food, food, and more food (in addition to the occasional drunken family member that makes it an awkward time for everyone… yep, you know who I’m talking about!). 

All joking aside it is a time to be thankful that your loved ones are near you, and that you are able to spend precious moments laughing and enjoying each other’s company (while sneakily gossiping about the hideous turkey print sweater that your Auntie has on....emmmm... uh.. seriously, why she would buy something like that is beyond me!?!?!)

The table setting for this day of feasting is as important (if not more important) than the bird itself.  One of my dearest family members always says “it’s all about the presentation!” and I couldn’t agree more, as the presentation is half the experience.

Early last week I received an email from resident SF Foodie Nimisha Ghandi of Club Dine In! to collaborate on creating the picture perfect Thanksgiving table centerpiece. So, on a sunny yet crisp Fall morning I gathered my $50.00 worth of Viburnum leaves, California Pepper Plant, Bright Orange Cockscomb, Pomegranate Bush bundle, candles, and ribbons and headed over to Club Dine In! HQ to set a gorgeous rose wood dining table. When I arrived I was thrilled to see that the host had set out a large pumpkin, mandarin oranges, decorative garland, maize husks, and other knick knacks to incorporate into the design.


As we chatted away, we each took on different aspects of setting the table, I snipped, tucked and placed flowers and foliage while Nimisha helped wrap recycled cans and yogurt tubs in wax paper that were to be used as our vases.  An hour and a half later, Nimisha’s husband walked over, took one look at the table and said: “I feel like we should be inviting Mayor Gavin Newsom over for Thanksgiving! This looks awesome!”

The perfect blend of simplicity and sophistication!
Don't throw out your wine bottles. Save them to use as candle holders!
Knick knacks from around the house (i.e. decorative balls) help fill in gaps
 This centerpiece is fully recyclable/compostable! (Some parts are even edible!!!)
Mini Apples and Pears are perfect accents for each place setting
As I finish typing up this entry, I am thinking of my loved ones near and far, and am thankful to have them all in my life. I wouldn’t be the person I am today if it weren’t for your presence in my life. 

Happy Thanksgiving everyone!
Bon Appetit!

Monday, November 15, 2010

Urban Glamor


The Sir Francis Drake hotel is smack dab in the middle of San Francisco, around the corner from the historic Union Square, and right next door to Saks Fifth Avenue (the mother ship of all high fashion!). Sky scrapers, Tourists, cable cars, shopping, and gorgeous display windows surround this beautiful hotel built in 1928. When I received an email from a lovely bride-to-be about designing her wedding flowers at this venue, I was jumping out of my skin. This was going to be the perfect mixture of urban living and glamor!

The first time I met with the bride, it was obvious that we were on the same wavelength. She wanted centerpieces with sculptural branches, and was envisioning dark purple, cream, and yellow as her colors. After seeing the two gorgeous rooms in which the couple was having their ceremony and reception in, my creative juices were flowing and I started to sketch out the entire mood of the event in my head.

The Ceremony: The ornate and high ceiling in the Franciscan Room along with the decadent floor to ceiling Navy blue draperies called for a lot of height in the altar arrangement. The table where the candle lighting ceremony was to take place was the focal point of the room and was flanked by a trio arrangement of curly willow, white calla lilies, and roses which flanked either side of the table.


The Bridal Party: The bride’s bouquet and groom’s boutonniere were in dark shades of purple, while the bridesmaids and groomsmen had bright yellow rose arrangements. Parents and grandparents of the bride and groom were each given a deep burgundy orchid boutonniere to set them apart from the rest of the bridal party.


After the ceremony, the guests sauntered on upstairs to the Empire Ballroom where they were greeted by a forest of jewel adorned Manzanita branches potted to perfection in a bed of white Hydrangeas and Lisianthus.


The bride and groom’s sweetheart table was the focal point of the room and was decorated with a Grape wood branch, Eucalyptus leaves, white Freesia, Purple Lisianthus, and couple of floating candles. This was the perfect complement to the bride’s bouquet which sat in a vase on the table. 


As my brilliant team and I were finishing the final touches to the centerpieces, the pastry chef rolled out the gorgeous cake for which we provided a floral topping. 


Another successful wedding,and another happy couple and we’re ready to take on the next special event! Congratulations to Susan and Christopher! 

Monday, October 25, 2010

Project Jack-O-Lantern


Ok my little Ghouls and Goblins; it’s time for your favorite holiday! Halloween!!!! Get out your knives, and start carving your Jack-O-Lanterns.

I have a little confession to make…I spent $50.00 on this week’s arrangements. I couldn’t help myself! IT’S HALLOWEEN!!!!! My favorite time of year!!!!! Surely you can understand?!?! 

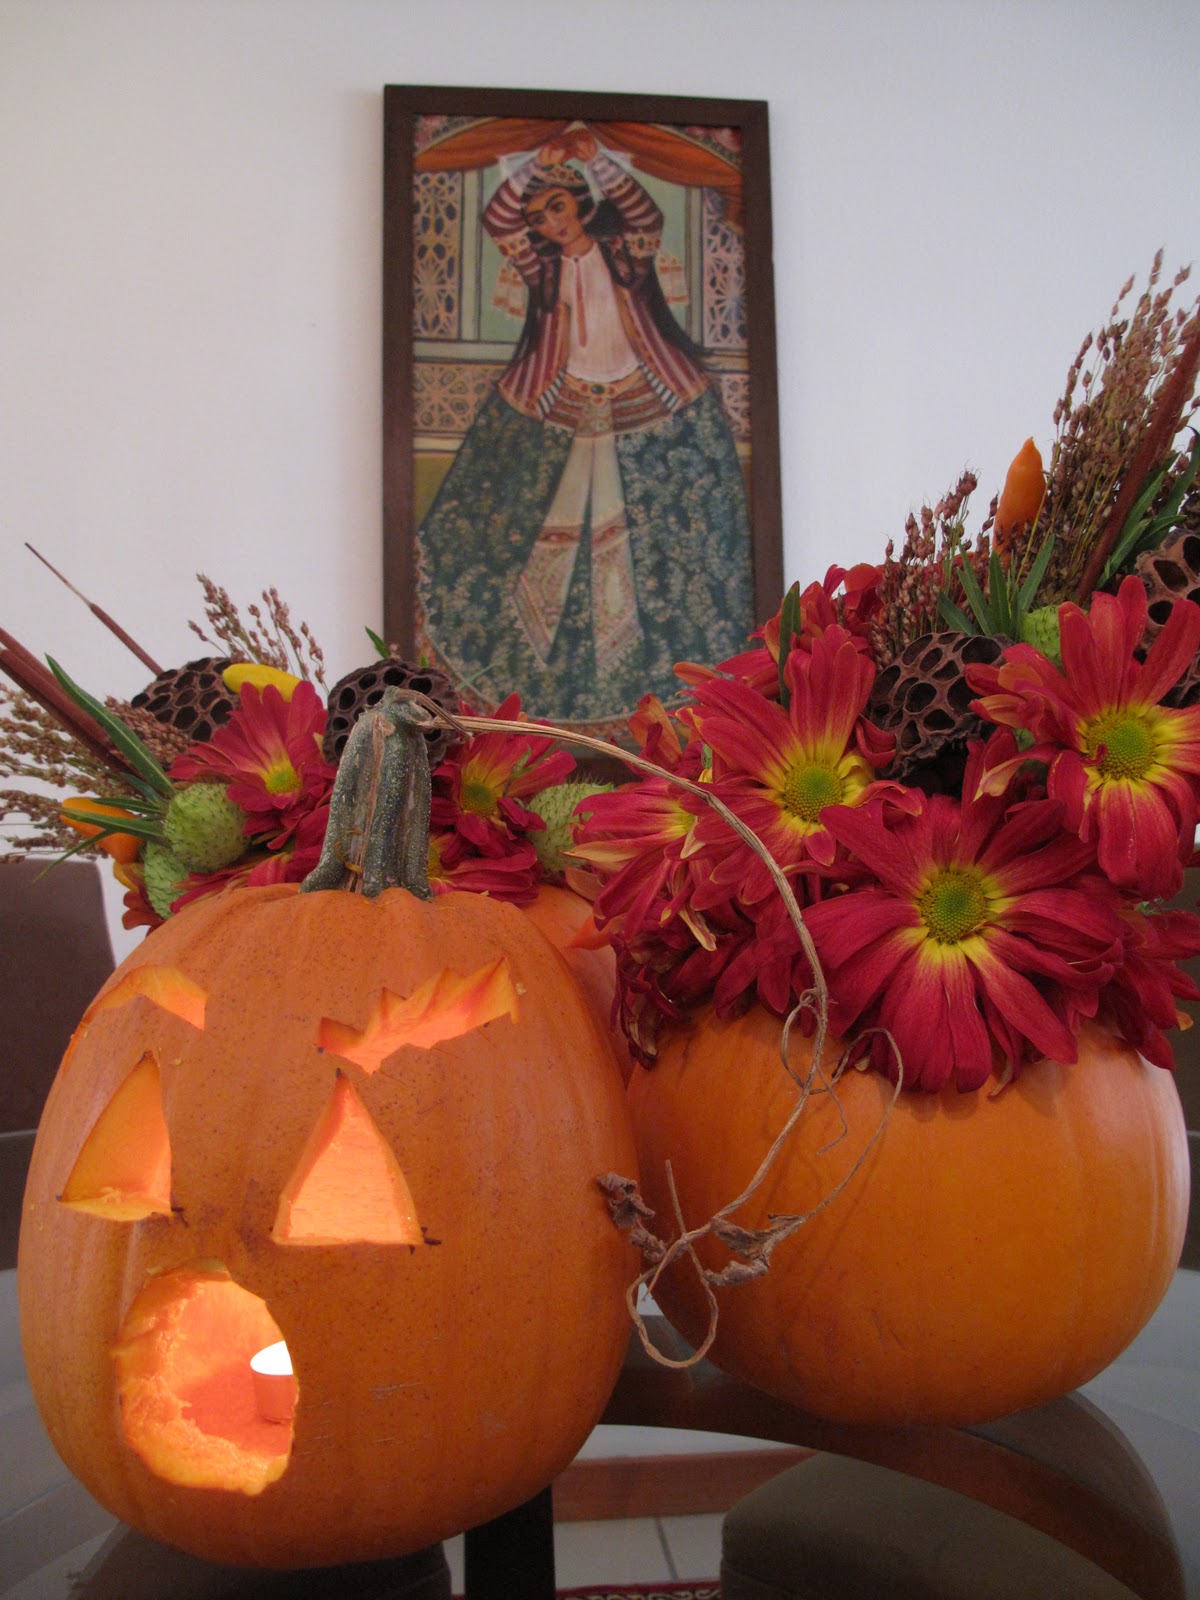
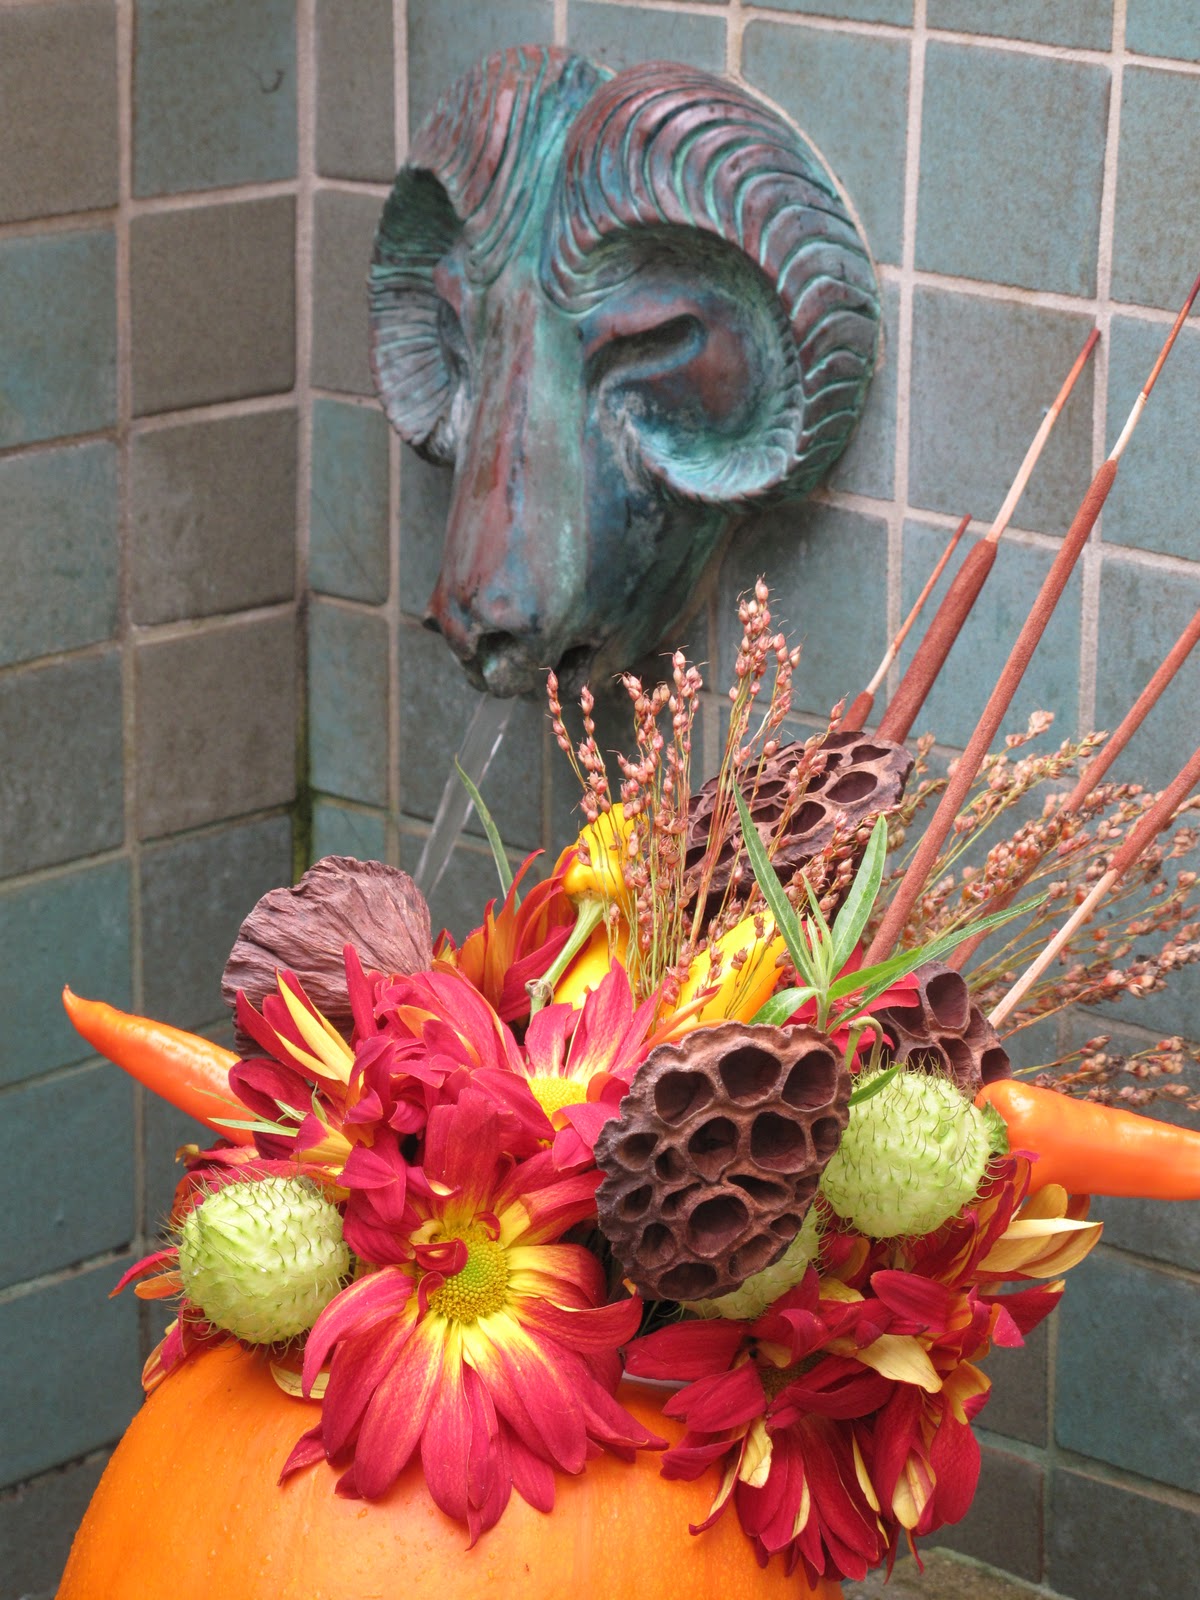
So here is what $50.00 bought me at the SF Flower Mart: Three Medium Sized Pumpkins, a huge bunch of Red Robert, dried Reeds, two bunches of Rice Stalks, and a bag of dried Water Lily Seed Pods.


Utensils: Pumpkin, sharp knife, metal spoon, two yogurt tubs, and a bowl to hold all the goop that comes out the pumpkins.


How to make a pumpkin vase:
1-   1- Cut a circle around the stem of the pumpkin that is equal to the diameter of the top of the   yogurt tub. You can be very precise about this and measure it, but I just eye-balled it. What’s life without a bit of human trial and error, eh?

2-   2- Empty out the goop inside the pumpkins with the metal spoon, and be sure to scrape the insides well to ensure that your pumpkin lasts a while.

3-   3- Once the pumpkin is emptied out, slip the plastic yogurt tub inside so that the rim sits right at the opening of the pumpkin.

4-   4- Pour water into the tubs, and start to get creative with the flowers. A good way to gauge how you’d like your flowers to be placed in your vase is to know how and where you’re going to use the centerpiece. This will determine the shape of your arrangement; tall and columnar, spherical and short, or natural and sprawling. 


For those of you that haven’t carved a pumpkin into a Jack-O-Lantern before, here are some easy tips on how to carve one:

1-   1- first two steps are identical to the pumpkin vases
2-   2- Once you have your hollowed out pumpkin, using a sharpie pen, draw your design onto the pumpkin and with a sharp paring knife cut outside the drawn lines until the pieces pop out.
3-   3-  Place a tea light inside the pumpkin, and light it up! 


Once the arrangements were complete, I took them down to the courtyard and set them up beside the fountain to help accent the entry. Happy Halloween!  


Monday, October 18, 2010

Spicy!


Fall is truly here. Crisp weather, wind, rain, boots, jackets, scarves, and the turning of colors! Just the right atmosphere for a cup of tea, a blanket, and a lovely flower arrangement on your coffee table to help you day dream about far away places while it’s gloomy outside…

This weekend I took my soon-to-be-married Cousin to the Flower Mart. We bundled up, got in her comfy car, turned up the seat warmers, and with lovely warm bottoms made our way down 6th Street. The Flower Mart had picked up the Autumnal vibe, and everywhere we looked we saw pumpkins, corn husks, hay bales, and wheat stalks.

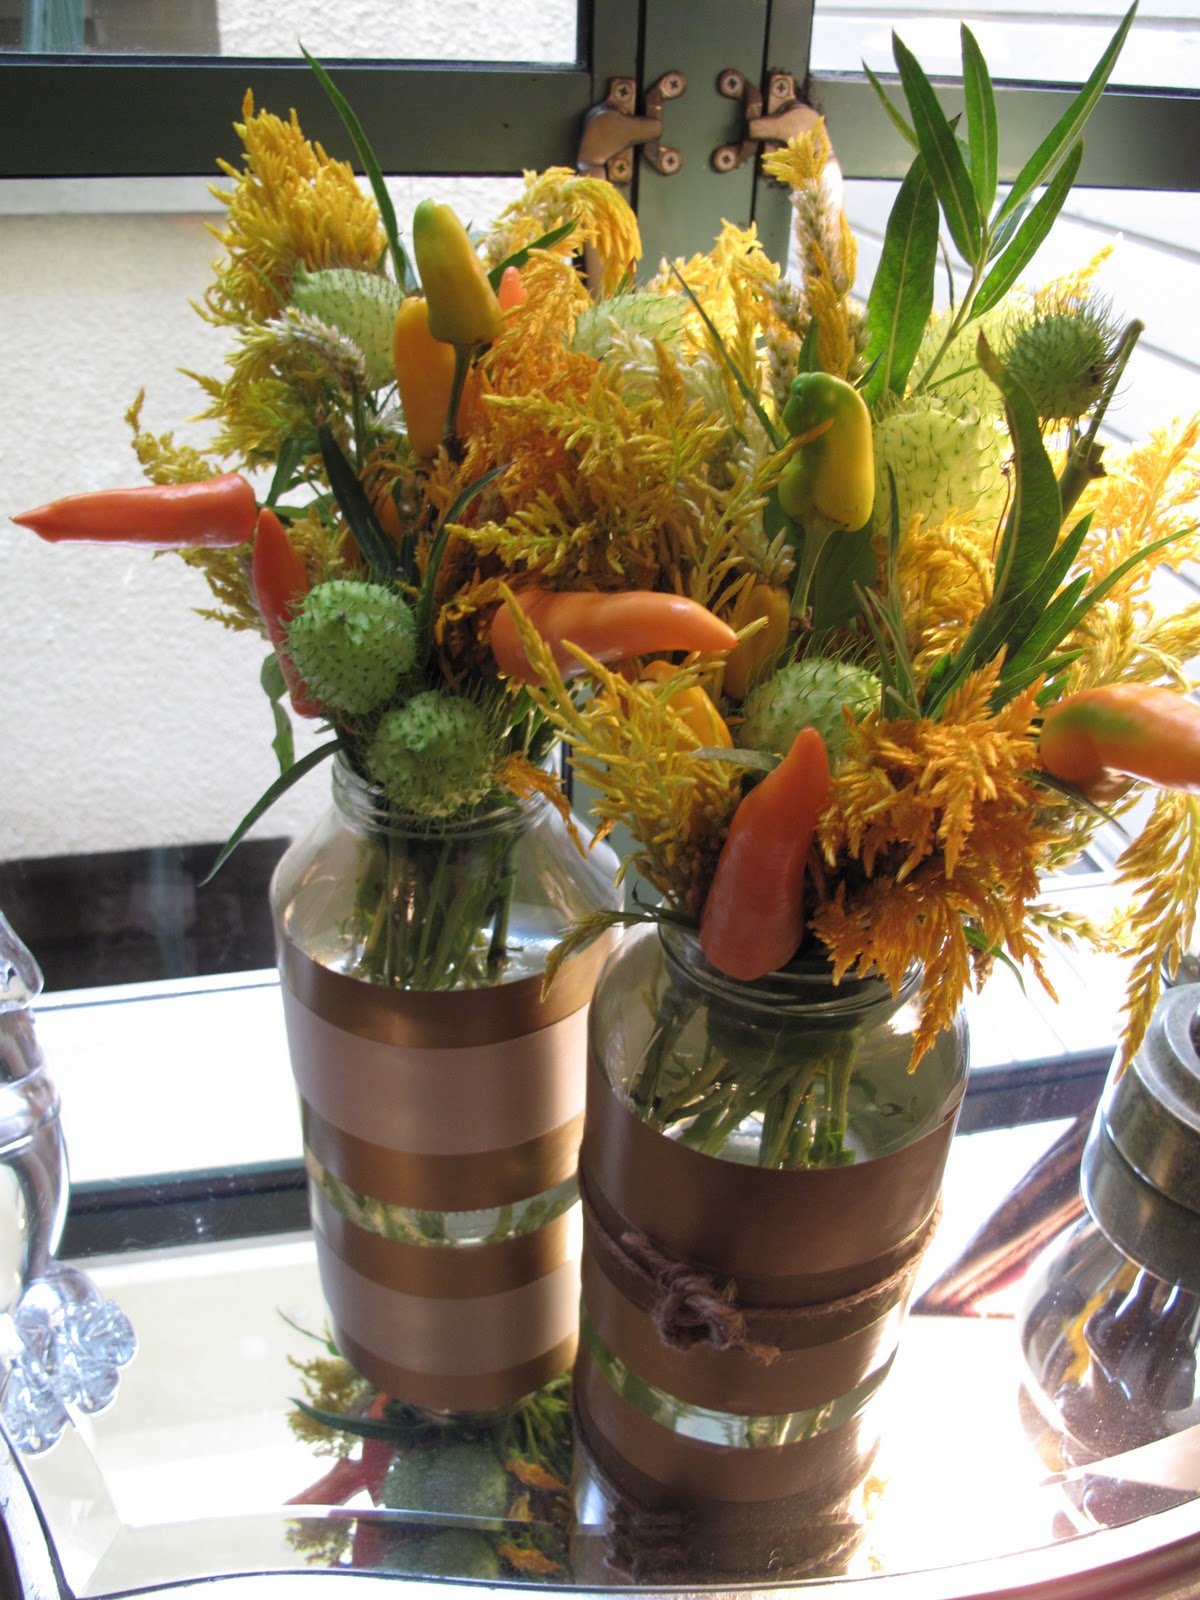
After much ooh-ing and ah-ing over pretty flowers we picked up a bunch of Milkweed (possibly one of the coolest looking plants out there), 2 bunches of Orange and Yellow Chili Peppers, and 2 bunches of a tall yellow grass that I don’t know the name of. (Any horticulturists out there that can help me out?)


I’d saved a few large jars that I wrapped up in some gold wrapping paper, and adorned with ribbon and twine to make my vases. Jars can prove to be better vases sometimes as they are not as malleable as plastic tubs, and don’t need reinforcement (rocks) in their base to weigh them down. 


Once the vases were ready, it was time to spice them up! 


Tip of the day: After touching Chili Peppers make sure you don’t touch your eyes. Been there, done that. Not fun!